
Hello Guys,
One of the best way to practice what you’ve been studying is to build a LAB. In this case, a Kubernetes LAB using minikube.
I’ll be posting an entire roadmap to Build a Kubernetes Cluster with a Master and 3 Workers.
Too figure out what is what, please stay tuned on my upcoming posts.
This is the step number one to Build this LAB Environment.
So, let’s stop talking and let’s start Deploying.
First, why “under KVM”? Well, this is my actual Virtualization tool I have installed on my PC, so, it’s a little bit different regarding the most common tutorials over the internet and differs a little bit from some steps.
This is my Centos 7 VM specs:
CPU: 8
HDD: 100GB
MEM: 8GB
CD Image: CentOS 7.7
Hostname: zlab-kub-mas1
IP: 192.168.122.100
Well, after installing a fresh OS and updated, we first need to install Docker.
I will install everything as root right?
Some prereqs first:
yum install -y yum-utils \
device-mapper-persistent-data \
lvm2
Than, we need install the Docker repository. I choose Docker Community Edition.
yum-config-manager \
    --add-repo \
    https://download.docker.com/linux/centos/docker-ce.repo
Let’s install and make sure it will start with the machine after reboots:
yum install docker-ce docker-ce-cli containerd.iosystemctl start dockersystemctl enable dockerNow, let’s install kubectl that will allow us run a lot of useful commands at the Kubernetes environment:
curl -LO https://storage.googleapis.com/kubernetes-release/release/`curl -s https://storage.googleapis.com/kubernetes-release/release/stable.txt`/bin/linux/amd64/kubectlMake the file executable:
chmod +x ./kubectlMove it to the PATH environment so we can run it everywhere:
mv ./kubectl /usr/local/bin/kubectlLet’s ensure that the command is running and installed:
kubectl version --clientNow, the best part: Install the minikube!
curl -Lo minikube https://storage.googleapis.com/minikube/releases/latest/minikube-linux-amd64 \
  && chmod +x minikube
Here is the point some tutorials may differ from this one. As we’re running on a Virtualized tool already, create another KVM or VirtualBox doesn’t make sense and put this working it’s a really pain in the neck, so we can proceed using Docker!
minikube start --vm-driver=noneTip: When we don’t set a vm-driver, minikube installation uses Docker as our run environment.
Let’s check the installation running
minikube statusYou need to see something like this:
[root@zlab-kub-mas1 ~]# minikube status
host: Running
kubelet: Running
apiserver: Running
kubeconfig: Configured
After minikube is up and running, let’s Deploy the Dashboard UI feature:
Let’s download the yaml template for this and save as dashboard.yaml:
curl -L0 https://raw.githubusercontent.com/kubernetes/dashboard/v2.0.0-beta8/aio/deploy/recommended.yaml >> dashboard.yamlThan, we need edit and add some NodePort in a part of this file created (dashboard.yaml) in this section:
The part that is:
kind: Service
apiVersion: v1
metadata:
labels:
k8s-app: kubernetes-dashboard
name: kubernetes-dashboard
namespace: kubernetes-dashboard
spec:
ports:
- port: 443
targetPort: 8443
selector:
k8s-app: kubernetes-dashboard
Needs to add those lines:
kind: Service
apiVersion: v1
metadata:
labels:
k8s-app: kubernetes-dashboard
name: kubernetes-dashboard
namespace: kubernetes-dashboard
spec:
type: NodePort
ports:
- port: 443
targetPort: 8443
nodePort: 30001
selector:
k8s-app: kubernetes-dashboard
Than run:
kubectl apply -f dashboard.yamlAfter, let’s take care of the SSL so it could be possible to us connect from the external network:
mkdir $HOME/certs

cd $HOME/certs

openssl genrsa -out dashboard.key 2048

openssl rsa -in dashboard.key -out dashboard.key

openssl req -sha256 -new -key dashboard.key -out dashboard.csr -subj '/CN=localhost'

openssl x509 -req -sha256 -days 365 -in dashboard.csr -signkey dashboard.key -out dashboard.crt

kubectl create secret generic kubernetes-dashboard-certs --from-file=dashboard.key --from-file=dashboard.crt -n kubernetes-dashboard
Well, here starts a little trick part, the part that we will first create an account to access the Dashboard, give the permissions and than be able to use the token generated to login to the Dashboard.
Create a file named adminuser.yaml and save the content with this:
apiVersion: v1
kind: ServiceAccount
metadata:
  name: admin-user
  namespace: kubernetes-dashboard
Than, run
kubectl apply -f adminuser.yamlAfter user creation, let’s give the permissions.
Create another yaml file named permission.yaml and save the content with this:
apiVersion: rbac.authorization.k8s.io/v1
kind: ClusterRoleBinding
metadata:
  name: admin-user
roleRef:
  apiGroup: rbac.authorization.k8s.io
  kind: ClusterRole
  name: cluster-admin
subjects:
- kind: ServiceAccount
  name: admin-user
  namespace: kubernetes-dashboard
After creation, run the command:
kubectl apply -f permissions.yamlDone this, let’s collect the token needed:
kubectl -n kubernetes-dashboard describe secret $(kubectl -n kubernetes-dashboard get secret | grep admin-user | awk '{print $1}')The command will show something like this, copy the bold section for the future login.
[root@zlab-kub-mas1 ~]# kubectl -n kubernetes-dashboard describe secret $(kubectl -n kubernetes-dashboard get secret | grep admin-user | awk '{print $1}')
Name:         admin-user-token-hx69p
Namespace:    kubernetes-dashboard
Labels:
Annotations:  kubernetes.io/service-account.name: admin-user
              kubernetes.io/service-account.uid: 2adb39fd-ddb8-47e9-ae6a-2c64d9243358

Type:  kubernetes.io/service-account-token

Data
====
ca.crt:     1066 bytes
namespace:  20 bytes
token:      eyJhbGciOiJSUzI1NiIsImtpZCI6IlZNNkdGWkNhRG9GRDMzS2lGakZPRFJySG94VUI3YkNOWlhEZ0pnaF9JTlUifQ.eyJpc3MiOiJrdWJlcm5ldGVzL3NlcnZpY2VhY2NvdW50Iiwia3ViZXJuZXRlcy5pby9zZXJ2aWNlYWNjb3VudC9uYW1lc3BhY2UiOiJrdWJlcm5ldGVzLWRhc2hib2FyZCIsImt1YmVybmV0ZXMuaW8vc2VydmljZWFjY291bnQvc2VjcmV0Lm5hbWUiOiJhZG1pbi11c2VyLXRva2VuLWh4NjlwIiwia3ViZXJuZXRlcy5pby9zZXJ2aWNlYWNjb3VudC9zZXJ2aWNlLWFjY291bnQubmFtZSI6ImFkbWluLXVzZXIiLCJrdWJlcm5ldGVzLmlvL3NlcnZpY2VhY2NvdW50L3NlcnZpY2UtYWNjb3VudC51aWQiOiIyYWRiMzlmZC1kZGI4LTQ3ZTktYWU2YS0yYzY0ZDkyNDMzNTgiLCJzdWIiOiJzeXN0ZW06c2VydmljZWFjY291bnQ6a3ViZXJuZXRlcy1kYXNoYm9hcmQ6YWRtaW4tdXNlciJ9.Qdsy_gd9hKbZZXjqmb8qXbO66s7CYAWl-x08vvPI31uZiSqGAOgF5gbfL3e-r_60kgTcXR5QFc-Mn_-BzXk-xUwZwRyefRJtWGCNKGQbVBl2y16C01y1kbs5iy9Ha2DRUpw6X3VjOeWCsKD7VUM6jIW9JpFk7Oc8wDn5NQQgHrNQkPBzvcckdeuMOq-NfnXixKLxuatQDP6nrIHwFDXRdo1vU6rPQczkTFmU-xTtcmTuGwzsysbnExrthoPbdtFbkILsC0brPJQHyIl8pl2E1O-WRSWvZmgXJNYgwcQsMSEzu79ktsij_NuFBo_lNSe_p6xBe7HY9IaWDTwZUlUqEQ
Now, that we have user and permission, let’s make some config so the server can start and run everything automatically:
systemctl enable kubelet.servicesystemctl stop firewalldsystemctl disable firewalldLet’s disable also SELINUX 🙂
On /etc/selinux/config file set SELINUX=disabled
Save the file
REBOOT
Once rebooted go to your web navigator and type https://192.168.122.100:30001/#/login
When requesting login, select Token and paste the Token we collect some steps ago.
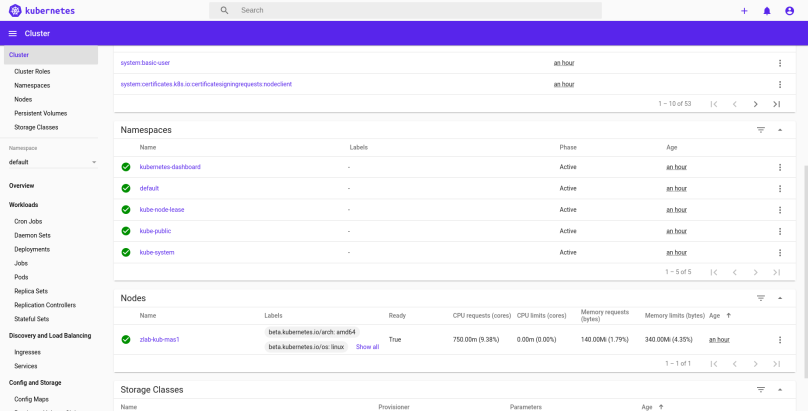
So, here’s is some basic overview in the faster way to make minikube installed and the Dashboard UI for getting great experience working with Kubernetes.
In the next posts I’ll show the next steps to build a Cluster with 3 Worker Nodes.
Special thanks to Fernando Rubens, DevOps fella who gives me some great tips to improve even more this tutorial. ❤ #go go go
I hope you all like this post and, if so, please give some feedback or improvement, share it and comment.
See ya!
